Worm composting, also known as vermicomposting, is one of the most efficient, clean, and space-saving ways to compost at home.
It’s perfect for apartments, balconies, small homes, classrooms, or anyone who wants to turn kitchen scraps into rich organic fertilizer—without needing a yard or a big outdoor pile.
The best part? It’s odor-free when managed properly, and red wiggler worms do most of the work for you.
In this complete guide, you’ll learn how to start and maintain a worm bin step by step—even if you’ve never composted before.
What Is Worm Composting?
Vermicomposting is the process of using worms—usually red wigglers—to break down food waste into nutrient-rich compost called “worm castings.” These castings are a powerful, natural fertilizer that improves soil structure and supports plant health.
Unlike traditional composting, worm composting doesn’t rely on heat. It’s a cool, microbial process that works indoors or outdoors in a small container.
It’s fast, low-maintenance, and great for urban environments.
Why Red Wigglers?
Not all worms are suitable for composting. Red wigglers (Eisenia fetida) are the best choice because they:
- Eat a lot relative to their size
- Thrive in high-density, shallow bins
- Reproduce quickly in healthy conditions
- Prefer decaying organic matter over living plant roots
You can find red wigglers online, at garden centers, or from local worm farms.
Regular earthworms (like those found in soil) don’t survive well in compost bins. Stick with red wigglers for best results.
What You Need to Get Started
Starting a worm bin doesn’t require fancy equipment. You can build one from basic materials or buy a ready-made kit.
DIY Worm Bin Materials
- Two plastic storage bins (10–18 gallons each)
- A lid to keep the bin dark and moist
- A drill for ventilation and drainage holes
- Shredded paper or coconut coir for bedding
- A small tray or container to catch liquid runoff
- 1 pound (approx. 1,000) red wiggler worms
- A dark, cool space to store the bin (indoors or shaded outdoors)
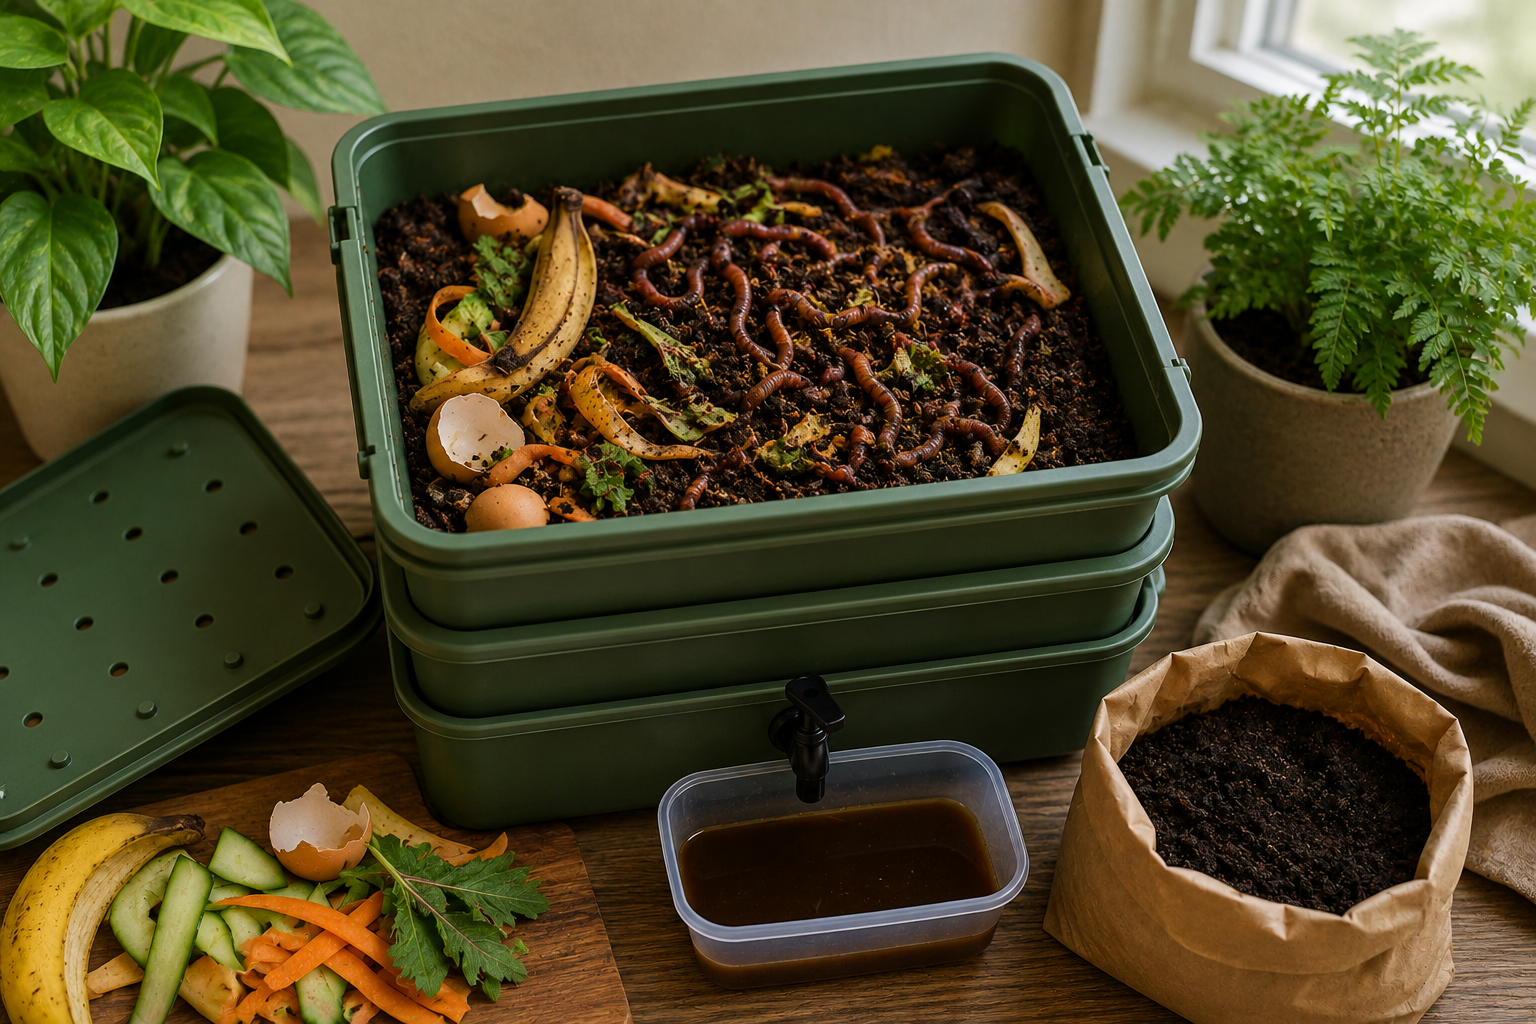
You can also build a stacking system with multiple trays that allows worms to migrate upward as they finish processing the lower levels.
How to Build a Worm Bin: Step by Step
Step 1: Prepare the Bin
Choose a shallow plastic bin with a secure lid. Drill small holes in the sides for airflow and several holes in the bottom for drainage.
Place the bin on bricks or small supports above a tray to catch excess moisture, often called “worm tea.”
Line the bottom with a thin layer of moistened shredded paper or coconut coir to create soft bedding.
Step 2: Add the Worms
Once the bin is set up, gently introduce your red wigglers. Spread them across the bedding and let them settle.
Keep the bin in a quiet, dark area. Avoid placing it in direct sunlight or near heat sources.
Let the worms acclimate for 24 hours before feeding them.
Step 3: Start Feeding
Begin with small amounts of chopped food scraps—fruit peels, veggie trimmings, coffee grounds, and tea bags.
Bury the food under the bedding in one corner of the bin. Cover it completely to prevent smells and fruit flies.
As the worms eat, gradually increase how much you feed them. Avoid overfeeding, especially in the first few weeks.
What to Feed Your Worms
Safe Foods (Greens):
- Fruit and vegetable scraps
- Coffee grounds and filters
- Tea bags (plastic-free only)
- Crushed eggshells
- Small amounts of bread or rice
Bedding Material (Browns):
- Shredded newspaper (black and white ink only)
- Shredded cardboard
- Coconut coir
- Straw or dry leaves
Maintain a balance between greens and browns. Too many wet scraps make the bin smelly. Browns absorb moisture and add carbon.
Avoid These:
- Meat or bones
- Dairy products
- Oily or fried food
- Onions and garlic (in excess)
- Citrus (too acidic for worms)
- Pet waste
These materials can harm your worms or disrupt the composting process.
Maintaining the Worm Bin
1. Monitor Moisture
The bedding should feel like a damp sponge—not soaking wet, and not dry. If it’s too wet, add more shredded paper. If too dry, mist with water.
2. Turn the Bedding Occasionally
Every 1–2 weeks, gently fluff the bedding with a fork to add air. This prevents compacting and allows microbes and worms to move freely.
3. Feed in Rotations
Always bury new food in a different corner. This spreads feeding areas evenly and helps you track where the worms are working.
4. Keep the Bin Dark and Cool
Worms avoid light. Keep the bin covered and stored between 55–75°F (13–24°C). High heat or cold will stress or kill your worms.
Signs of a Healthy Worm Bin
- No foul smells—only a mild, earthy scent
- Active worms near food
- Moist, loose bedding
- Little to no leftover food after a few days
If you notice mold, pests, or unpleasant smells, adjust feeding, moisture, or ventilation.
Harvesting the Worm Castings
After about 2–3 months, you’ll start to notice a dark, crumbly material at the bottom of your bin—this is finished worm compost.
Here’s how to collect it:
Method 1: Side-to-Side Migration
Push all compost to one side and add fresh bedding and food to the other. Within a week or two, worms will migrate toward the new food, and you can scoop out the castings.
Method 2: Light Method
Dump the bin onto a plastic sheet under a bright light. Worms naturally move away from light. Scrape away the top layer every few minutes. Eventually, you’ll be left with just the worms.
Method 3: Use a Stacking Bin
If your worm bin has multiple levels, the worms will move up as you add fresh food. The bottom tray will be full of castings, ready to harvest.
Use worm castings in your potted plants, garden beds, or mix them into soil. They’re packed with nutrients and beneficial microbes.
Dealing With Common Problems
Bad Smell?
Too much food or not enough dry bedding. Remove excess scraps and add more shredded paper.
Fruit Flies?
Make sure all food is fully buried. Cover the top layer with dry bedding. You can also freeze food scraps before adding them.
Worms Escaping?
Check for too much moisture, acidity, or temperature stress. Let the bin rest and add dry bedding.
Mold?
A little mold is okay, but too much means overfeeding. Reduce food and improve airflow.
Final Thoughts: Vermicomposting Is Easy, Clean, and Powerful
Worm composting turns your everyday food scraps into rich, living soil with very little effort. Once your bin is set up, the worms take care of everything—quietly, cleanly, and efficiently.
It’s an amazing way to reduce waste, support your plants, and learn how nature recycles nutrients. Plus, it’s kid-friendly, science-friendly, and ideal for small living spaces.
All you need is a bin, some worms, and a few minutes each week. In return, you’ll get the best compost you’ve ever used—straight from your kitchen to your plants.